
The Case

This is the Thermaltake Armor VA8000. If you're one of those people that likes a system with a small footprint, you're not going to like this case. It's big. Personally, big cases don't bother me...I keep my system on the floor next to my desk, and I like knowing that just about anything I may want to add in the future will fit! I also like having plenty of room to move around in when I'm swapping out cards or whatever.


One of the things I liked about this case was the fact that there are external USB, fire wire, and audio ports on top. Since I keep my system on the floor, this makes them easy to get to.

Cables that run down from these external ports will attach to the motherboard.

This is a nice touch too...the unit that has the power switch, reset switch and drive and power lights can be removed and put in any of the front slots that you want. I decided I wanted my DVD drive to be in the top slot, and moved this power assembly about halfway down.
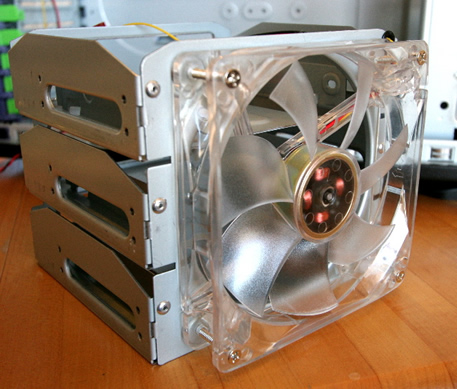
The drive racks have nice big fans in front, which keeps air flowing over the hard drives to help keep them cool.
Before we install the motherboard, let's get the power supply installed in the case.

The power supply is a metal box with a bunch of cables coming out of it.

Some specs on the OCZ GameXStream OCZ600GXSSLI ATX12V 600W Power Supply if you're into that sort of thing.

Pretty straightforward...slide the power supply into place...
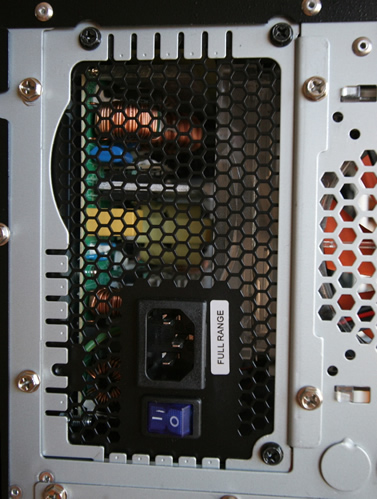
and it attaches with 3 screws.

A bunch of power cables are now available to plug into anything that needs power...the motherboard, the drives, the fans, the graphics card, you name it.
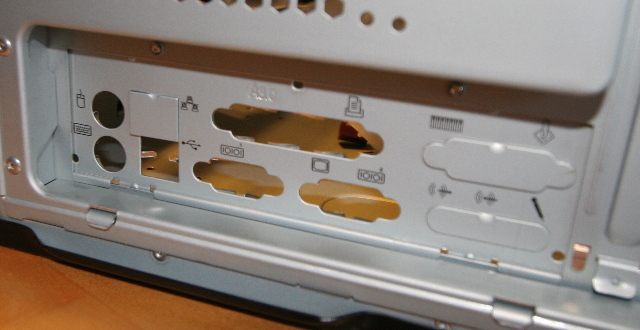
You might think it's an amazing coincidence that the manufacturer of your case knew exactly which motherboard you would be using, and all the ports would line up just right. No such luck. Fortunately for you, your motherboard came with a panel that can replace the generic panel in your case.
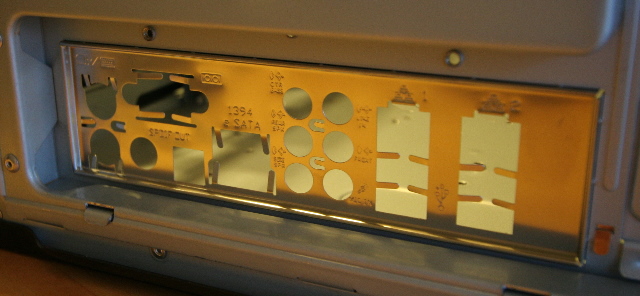
Here you can see that nothing lines up except the mouse and keyboard connectors on the generic case plate.
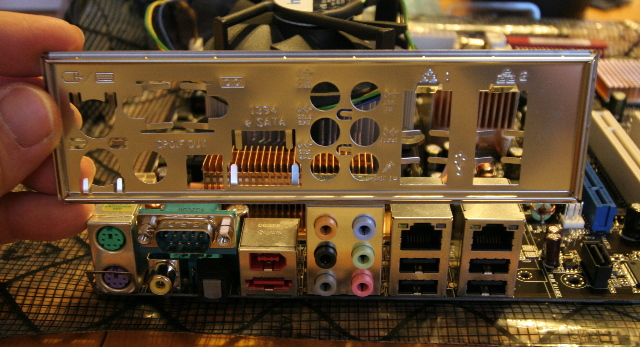
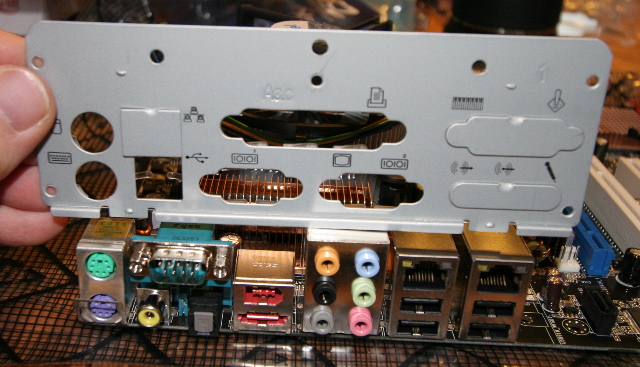
But the plate that came with your motherboard should be correct.
The correct plate usually just snaps in place from the inside of the case.
Ok, with the power supply in place and the correct motherboard port faceplate installed, let's install the standoffs for the motherboard.
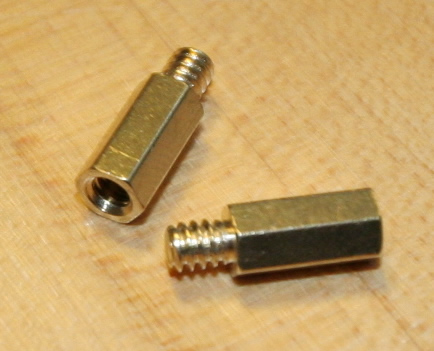
Standoffs is a fancy name for "little brass bolt-things". These get screwed into the holes in the case, and then the motherboard gets screwed onto them. They act as spacers to make sure there's plenty of space between the motherboard and the case itself, so nothing will short out.
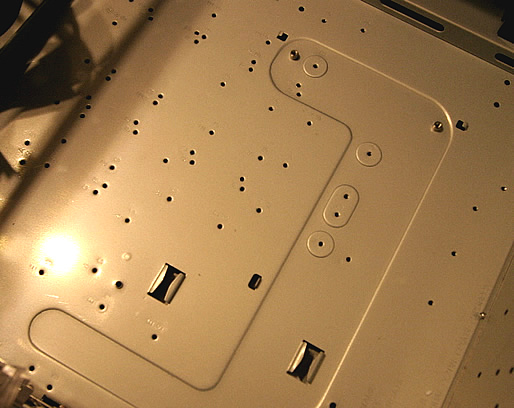
Which holes? That depends on your motherboard. The easiest way too find out is to set your motherboard in place and see which holes in the motherboard line up with which holes in the case. Those are the ones you'll install the standoffs into.

This shows one of the mounting holes on the motherboard.
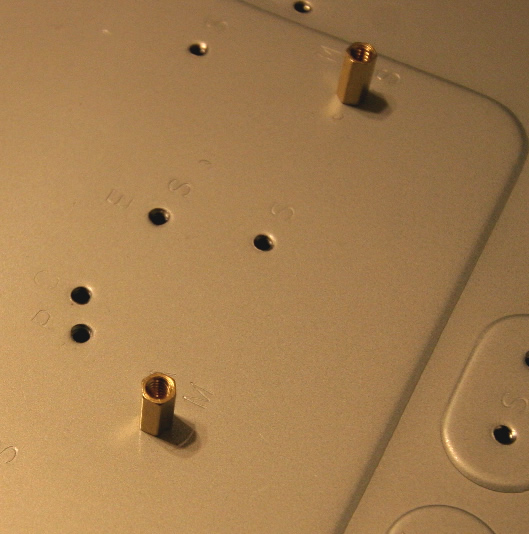
Here are a couple of the standoffs in place. Don't over tighten these, but use a small wrench to make them snug. The screws that hold the motherboard in place will be screwed into these, and you don't want them spinning around loose.
Once the motherboard is in place, it's time to get it wired up.

This shows the main connector for the control wires. Your case will have a bunch of tiny wires hanging out of it, that need to be connected to the motherboard. These include the power switch, the PC speaker, the drive activity light, the reset switch, etc.
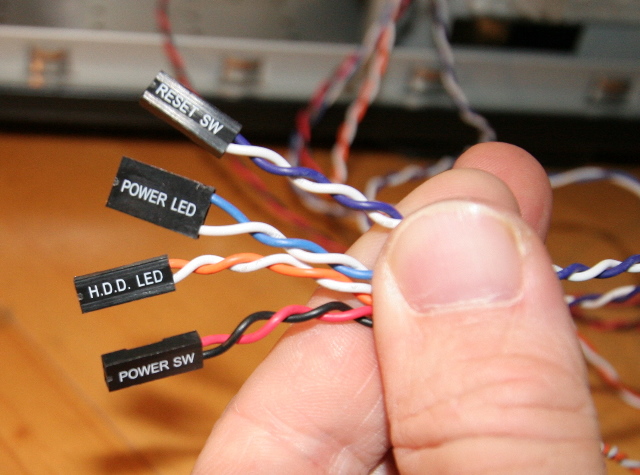
The wires from the case.
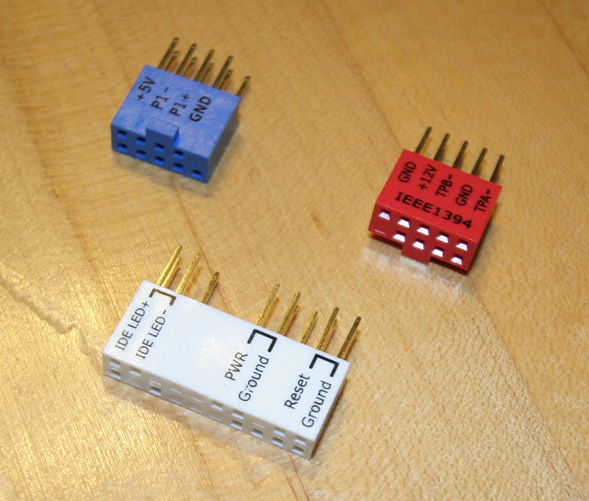
This particular motherboard makes things a bit easier by including some quick connectors. You attach the motherboard wires to the connector, and then slide the whole connector onto the motherboard. Makes things a little easier. Above, you can see clockwise from top left, a USB connector, a fire wire connector, and the main wiring harness connector.
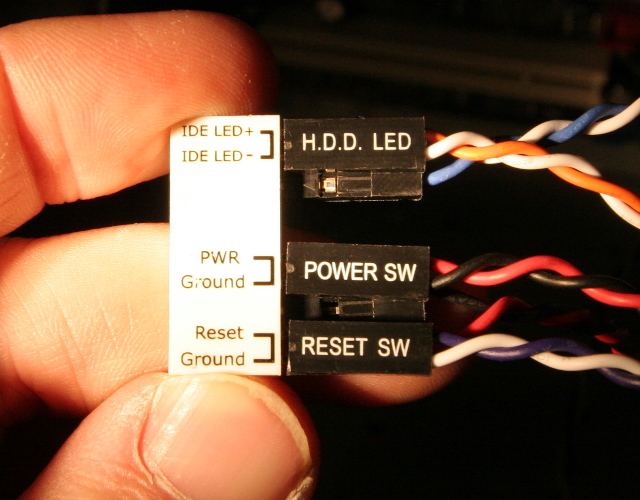
The cables from your case should be labeled, and will coincide (somewhat) with the connectors on your motherboard, or in this case, the quick connector.

The quick connector being slid onto the motherboard connector.
Different cases have different methods of installing drives and dealing with the front faceplates. In this case, (get it, in this case?) there are removable faceplates running up and down the entire front of the case.
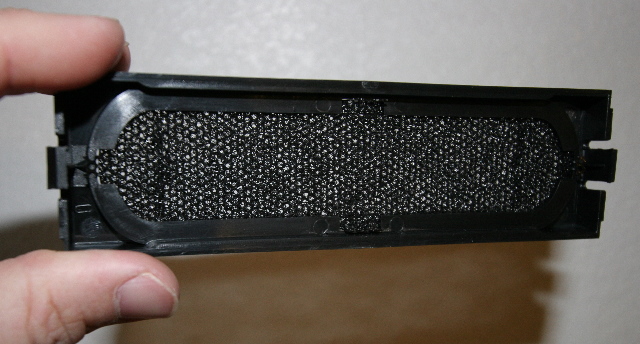
They snap out let you slide your drive into whichever position you want. You can see in this shot that each of these has a removable filter that can be cleaned, which helps keep the dust down.

The Samsung SH-S183L DVD burner in place.

Gotta love SATA connectors. One for the drive, one for power. No jumpers to mess with or Master/Slave annoyances like in the IDE days.

The SATA drive connectors on the motherboard.

Here I've installed the two hard drives into the removable drive bay. The SATA connectors and power connectors have been attached.

The card reader/floppy drive installed. Each of the front panels has a 3.5" removable faceplate to allow installation of 3.5" drives.

Ok, we've got the motherboard in place, the SATA hard drives plugged in, the DVD-ROM drive installed, and the floppy drive/card reader in place.
Let's add the graphics card.
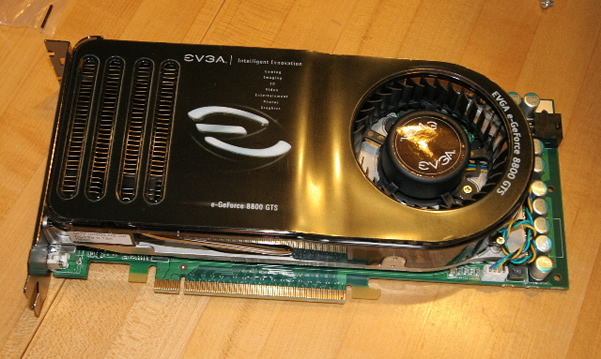
Man, these things are getting bigger all the time. This is the evga GeForce 8800 GTS. Note that it has it's own cooling fan, and requires it's own power.

This case has copper contact strips between the rear slots for added grounding. I have removed two of the slot covers, since this graphics card is two slots high.

I'd like to take a moment here to talk about newfangled gadgets. You can see in this shot that this case uses plastic snap-down card holders. Cool idea, huh? Because who wants to mess around with those annoying, difficult screws? Well, maybe not so cool. Because in my case, these purple plastic bits completely prevented me from being able to install my graphics card.
There just wasn't room. Fortunately, the cool plastic thing was not riveted in place, but was held in by removable screws. So I removed it.

Old School: Using Screws.

I decided to give the cool plastic things a second chance...maybe they would hold my other cards better, so I put them back in after the graphics card was installed. But when I installed the plate that allows extra USB connectors, the plastic clips failed to hold the card in place if any pressure was applied.
I'm all in favor of cool new things, but when they prevent you from accomplishing what should be simple, they suck.
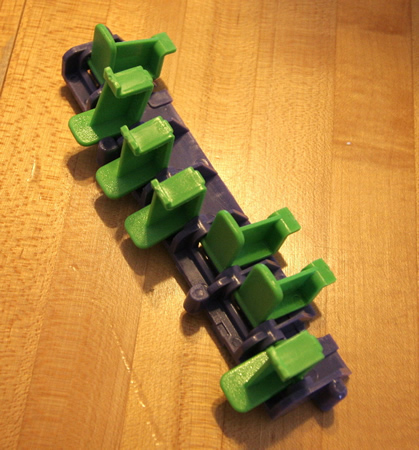
The failed, removed, and humiliated cool plastic things.

The extra USB slots are provided by installing the adapter that comes with the motherboard. It's plugged into a USB port on the motherboard.
![]()
![]()